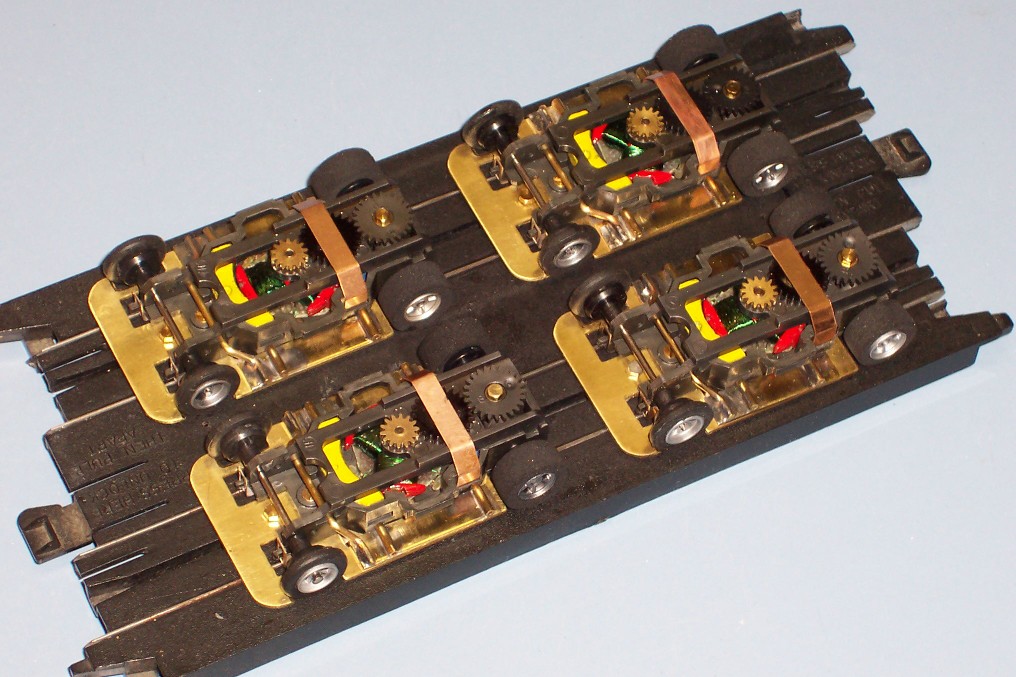
Building the TCP Pro-Pan 1-A
by
Doug Morris...April 2011
A Little History:
TCP
was a small company in the early 70s that was owned and operated by Tom Coyne.
He manufactured a line of speed parts for HO cars including brass pans, brush
tubes for Afx cars along with front and rear tires. His rear tires were the
standard of the day, the first HOPRA Nationals was won on TCP tires.
I was fortunate to be in a very good HO club in Flint Michigan, among our members
were Tom Coyne, Al Miltich, Russ Beal, Dave Livesay and Steve Brown. Al won
the first HOPRA Midwest series that predated HOPRA Nationals, and of course
Steve won the first Nationals. I was a kid, not realizing how lucky I was to
be around all of these guys.
The Goal:
In this article I'm going to show you, or attempt anyway, how to build the simplest
of the TCP pans, the
Pro-Pan 1-A. Most TCP pans required the hobbyist to do a lot of cutting,
gluing and fabricating. The closest any of the pans came to a simple bolt on
were the pan kits designated Pro Pan 1-A and Pro Pan 1-B. The only difference
between the two is the 1-A is .025 while the 1-B is .032. I'm also going to
show you the basics of how to build the shaker plate, also know as the body
mount.
One of the reasons I'm doing this is because last year I acquired a number of
these pans in bulk from Tom Coyne. Many of you may have already bought some
of these vintage pans from me on Ebay, so I thought what better thing to do
then to share how to build them up.
Below is a vintage card of how they were marketed. Also shown is the instruction
sheet that came with each one.

A little more history:
In an effort to make them a true bolt on for the beginning racer Tom bought
bare Afx chassis by the card, carefully removed the chassis, modified them,
re-inserted them into the card, taped and re-labeled them. I bought a partial
card on Ebay a couple of years, the only one that I know of to exist, it
can be seen on the Riggen HO site. Below is one of the chassis from that
card and as you can see it has been modified.
In a nutshell, what Tom did was to drill out all but the front rivet, he then
trimmed the holders and rear brush spring piece so the pan wouldn't short out
the electrics. The parts were riveted back on, two mounting holes were drilled
and to complete things the front of the chassis was trimmed to clear the pan.
Now the Pro-Pan could be installed, running gear assembled and the car was done,
well sort of.

There was one problem with this. If you look closely at the Afx chassis in the
picture you will see that there is a thickness difference in the areas where
the two rear mounting holes are drilled. In other words if you were to screw
a pan onto this chassis the right rear of the pan would be much closer to the
track than the left rear, possibly requiring larger rear tires to get that one
corner to clear. There is no mention in the directions
of lowering this area. Back in the day when I build one of these
I trimmed out that area so the pan would be level across the back, as you scroll
down through the pictures it will become more clear as to what I'm talking about.
Tools and Materials:
I have built a lot of pan cars over the last few years and have learned a lot,
I know this tool list is a bit lengthy but if you are going to continue building
brass cars I'll guarantee you that you will use them sooner or later.
Rivets, this project is going to take some of the rivets that were used on the
T-Jets and Afx cars. I'm using the ones that TCP bought 30+ years ago. I have
seen talk on the discussion boards and they seem to be a common item and are
actually called eyelets. If someone has a ready source and wants to pass it
along just email me momstractors@aol.com
and I'll pass it on.
#1 X-Acto handle
#11 and #16 X-Acto blades
1/32 drill
1/16 drill
1/8 drill
0-80 tap
pin vices
Dremel
mandrel and cutting disks for Dremel
jeweler files
small scissors
alligator clips
tweezers
needle nose pliers
solder gun
sandpaper
solder
flux
-----------------------------------------------------------------
Here is the pan just sitting on the NOS unmodified chassis:

Step one is to drill out the rivets without ruining any of the pieces or the
holes. I usually use a drill from the inside, note that only one side is being
removed:

Notice the empty space under the pickup holder that is left, we are going to
use that space to help trim that holder while still on the car:

Scribe a line along the edge of that empty space, score it several times and
carefully bend off the unwanted portion:


Now cut down the loose one to the same size as the one on the car:

Set the pieces back on the car but do not rivet them down, use the top piece
as a guide to scribe the brush spring. Also scribe a second line as shown in
the picture below so as to give you a guide for cutting out the corner of the
brush spring:

And cut it out:


Don't rivet it on yet, use the pieces to scribe where the chassis needs to be
cut:

These are my basic tools to bring the X portion down level with the other side:

Take your time, use a sharp knife, remember, if it was easy everybody would
be doing it....


Forgot to add Band Aids to the list. Trim off the raised "MADE IN SINGAPORE"
while you have the knife there...
When completed it should look like this:

Now rivet the holder/brush spring back on.
Since these pans have been laying around for 30+ years I like to clean the threads,
Walthers makes a neat little 0-80 tap that fits in a pin vise:
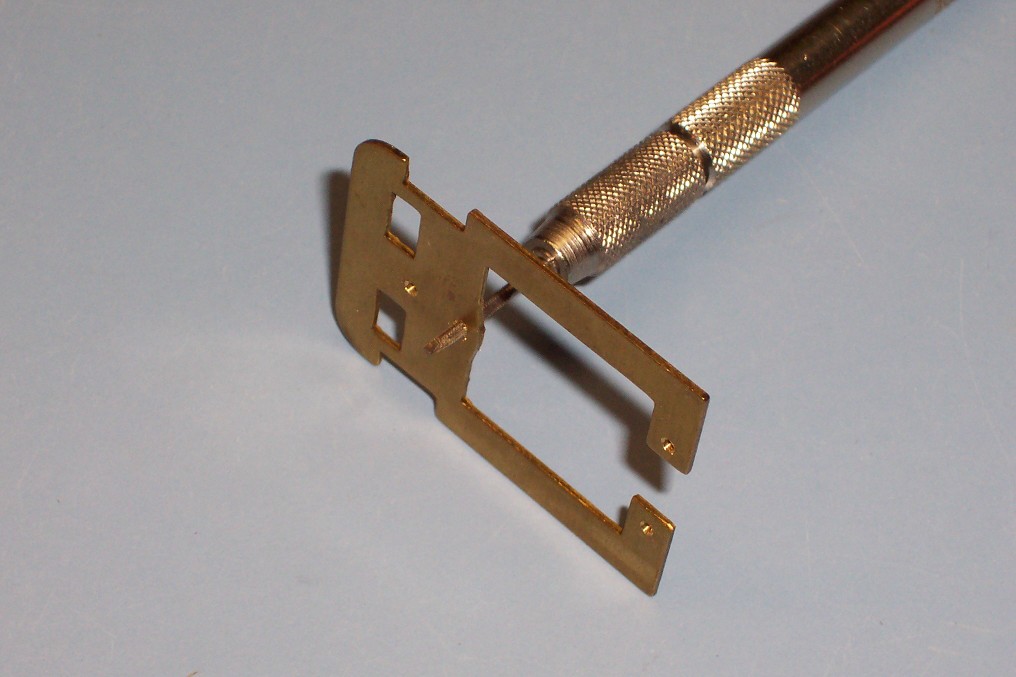
Fit your pan, notice the pan is bumping into the brush spring. Afxs were a high
production item, they are not all created equal. On some of them it is possable
to trim the brush spring enough but I have found that it's easier on most to
trim the pan:
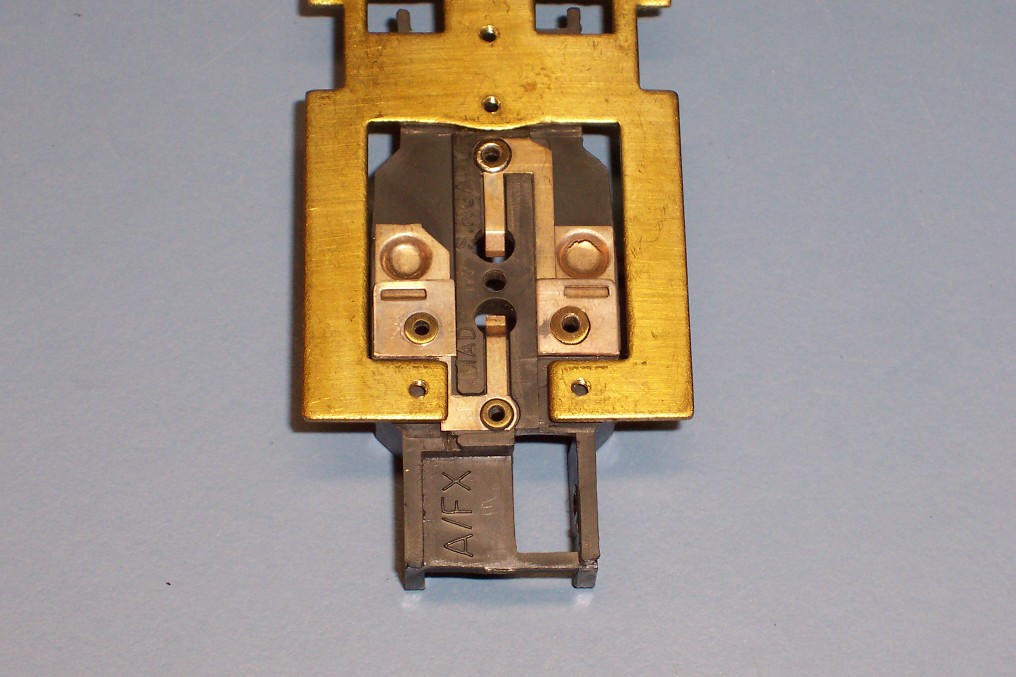
The "hump" also needs to be filed a bit to help clear at the front,
file the black areas:
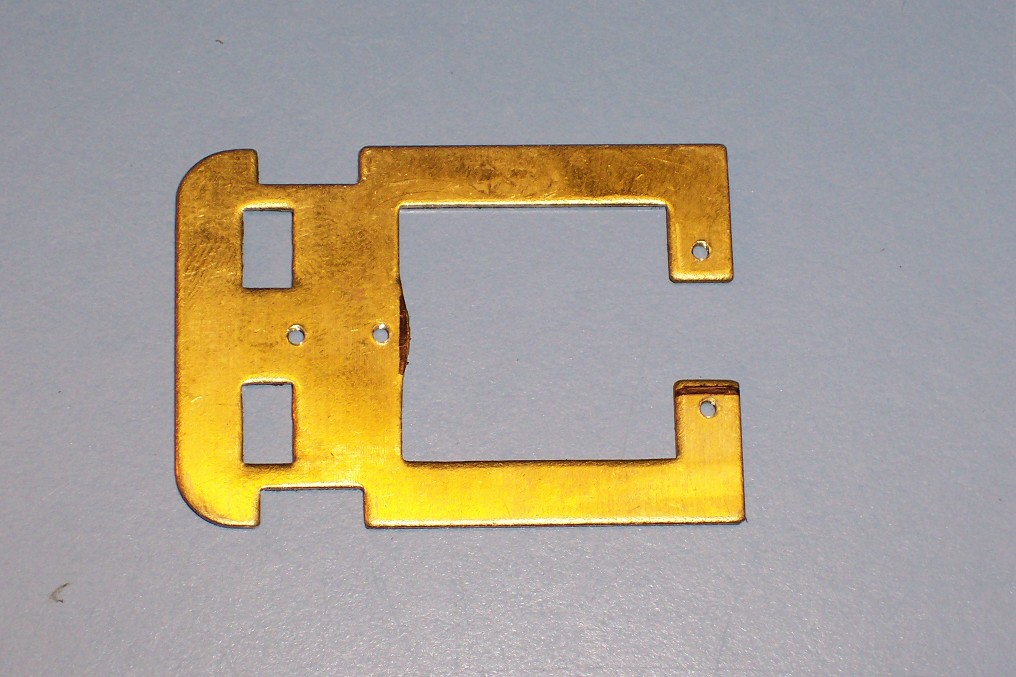
This is the way we should be fitting:
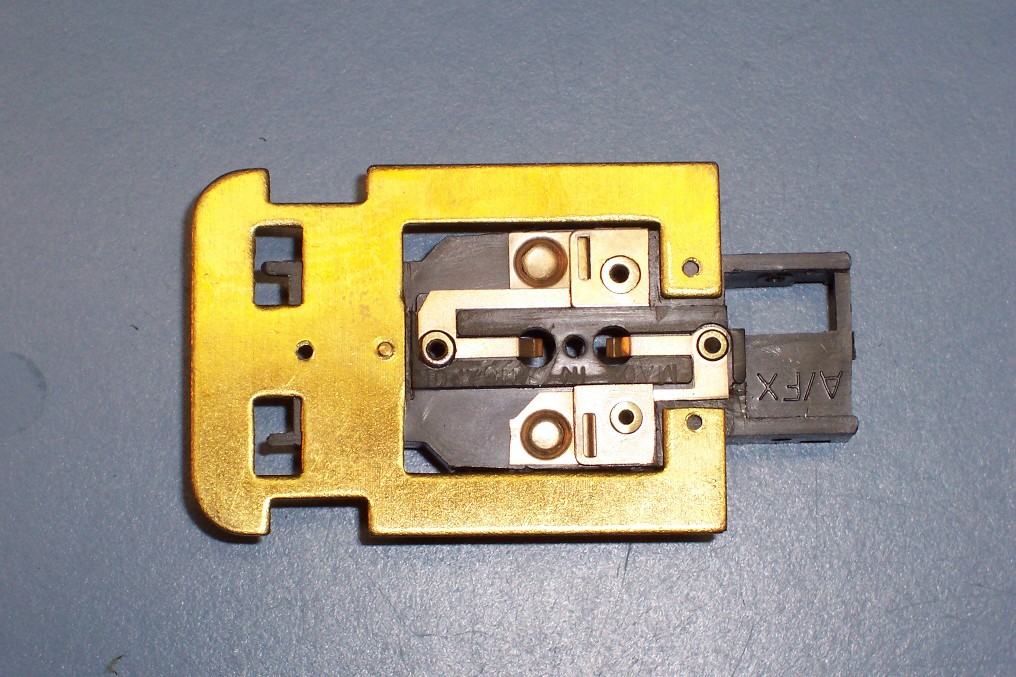
Fasten the pan with the front screw, I then use a 1/32" drill to carefully
center drill one of the rear mounting holes. Make sure to hold it all square
while doing this:
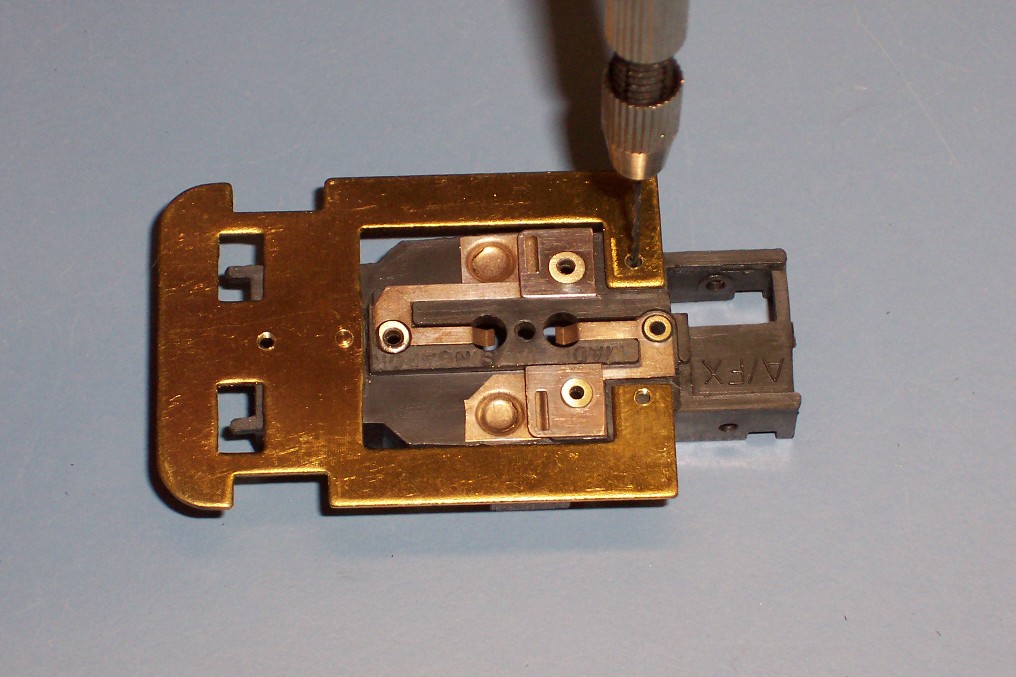
Follow with a #56 drill. Work it by hand, use a sharp drill so it won't wander,
you don't want to destroy the threads:
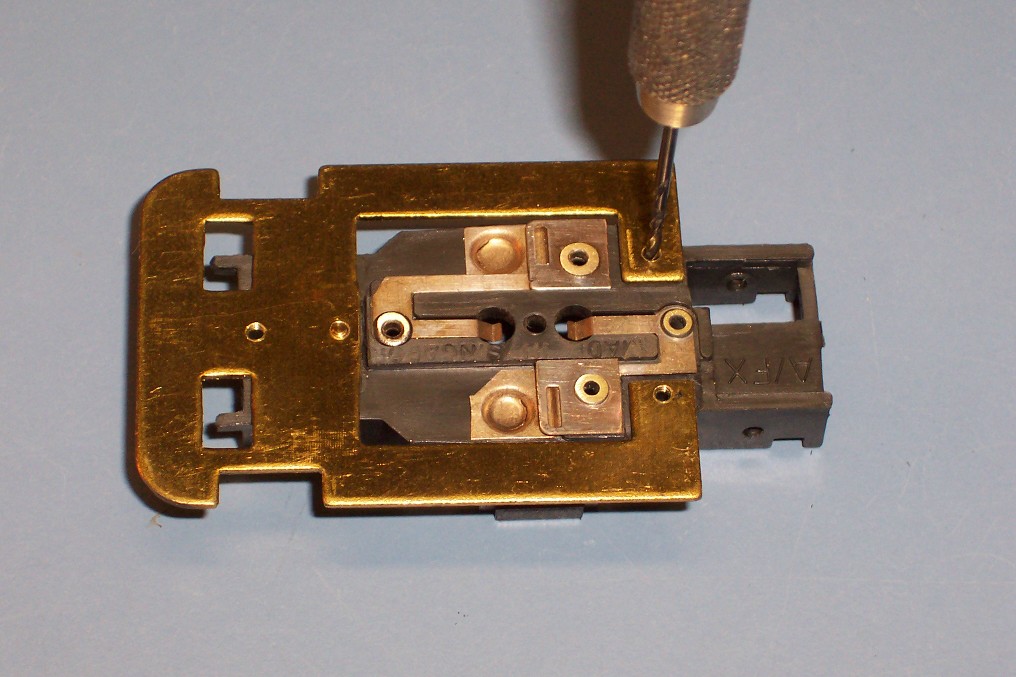
Once that is done I follow each hole with a 1/16" bit and countersink the
holes with a 1/8" bit. Once again, sharp bits, do it all by hand and work
slow:
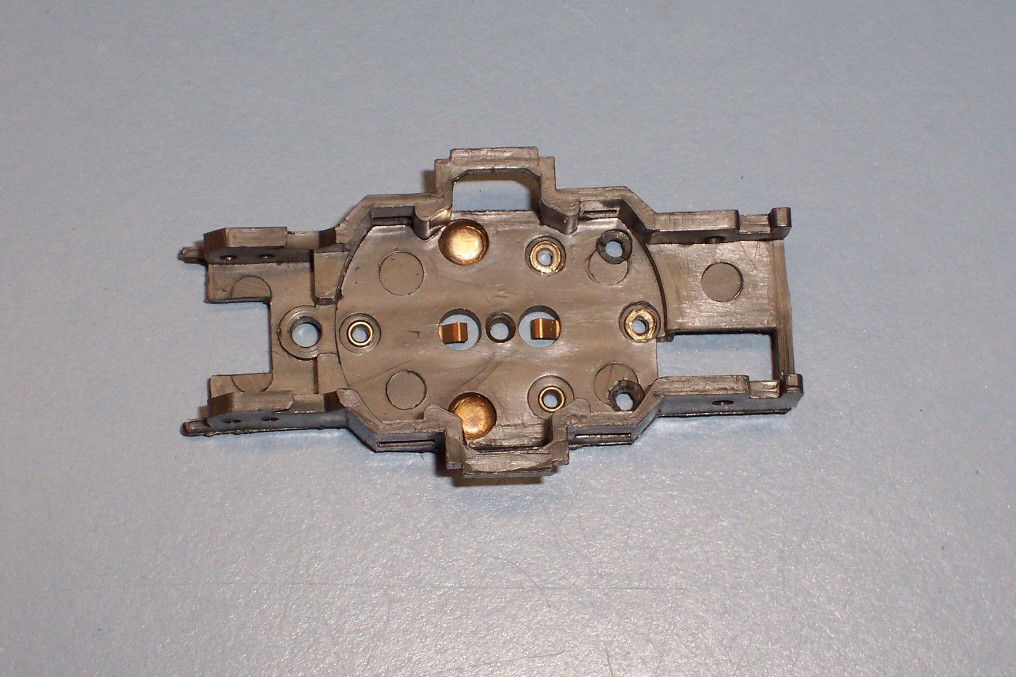
I like to flat sand the pan to remove all of the burrs left by tapping, 500
paper works nice:
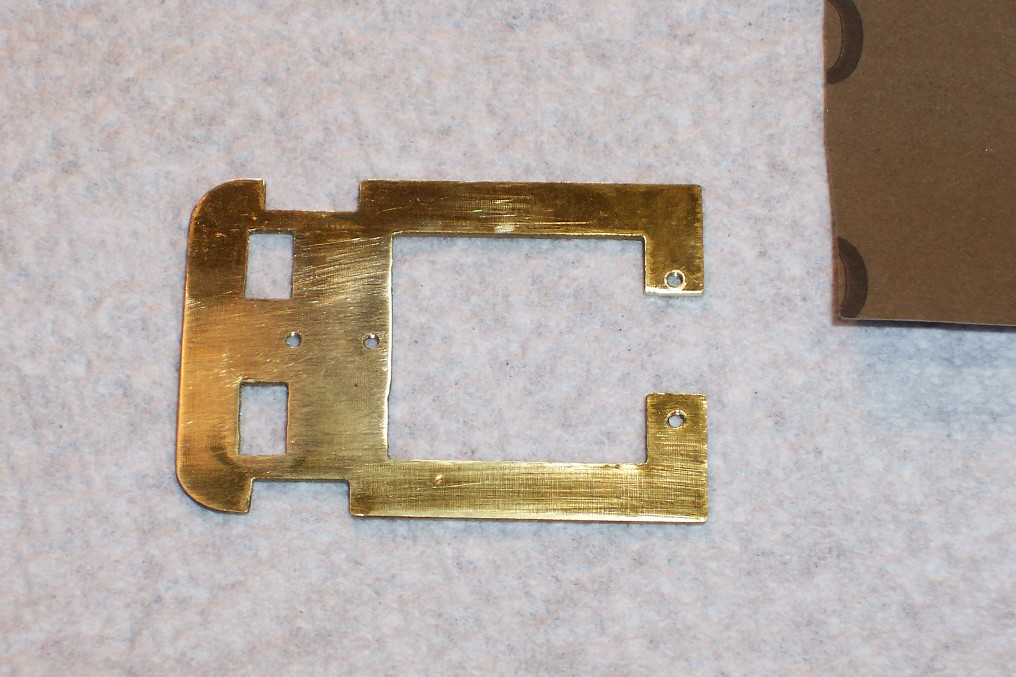
Next we are going to carefully cut some notches under the front gear plate mount
to hold the shaker plate. I like to use a Dremel disk:
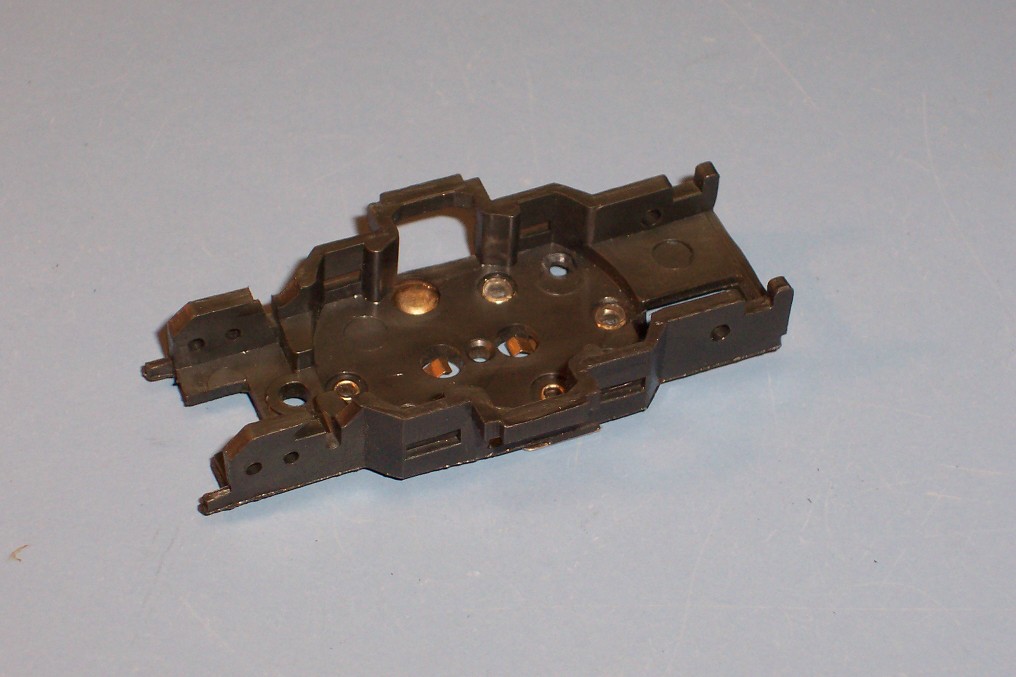
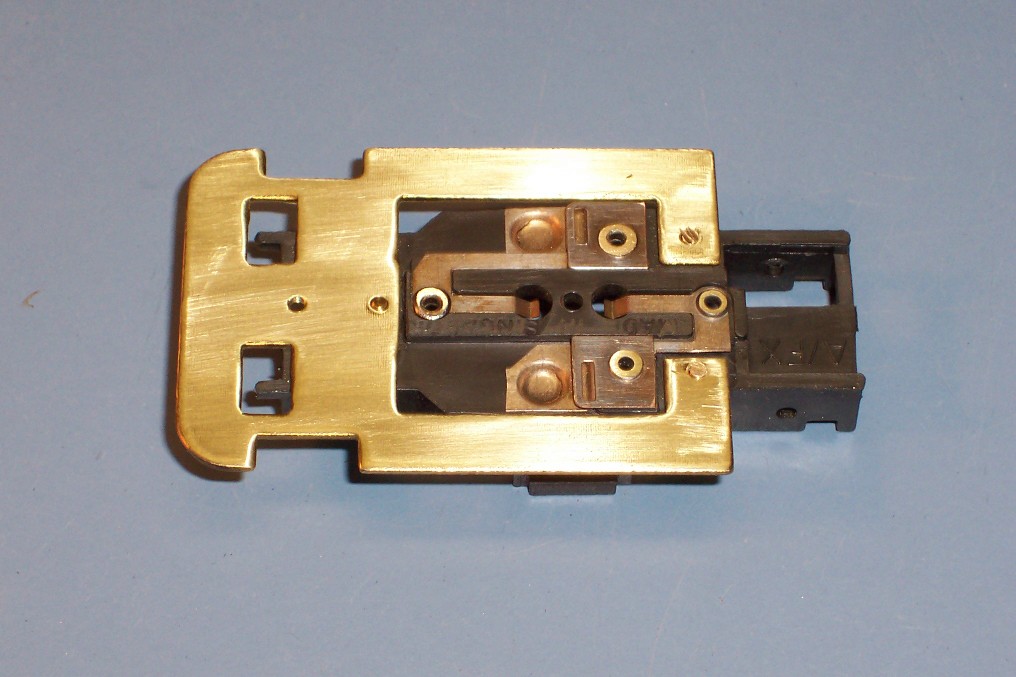
Bolt the pan on and file the protruding screw ends off. Gluing the pan along
with the screws is optional:
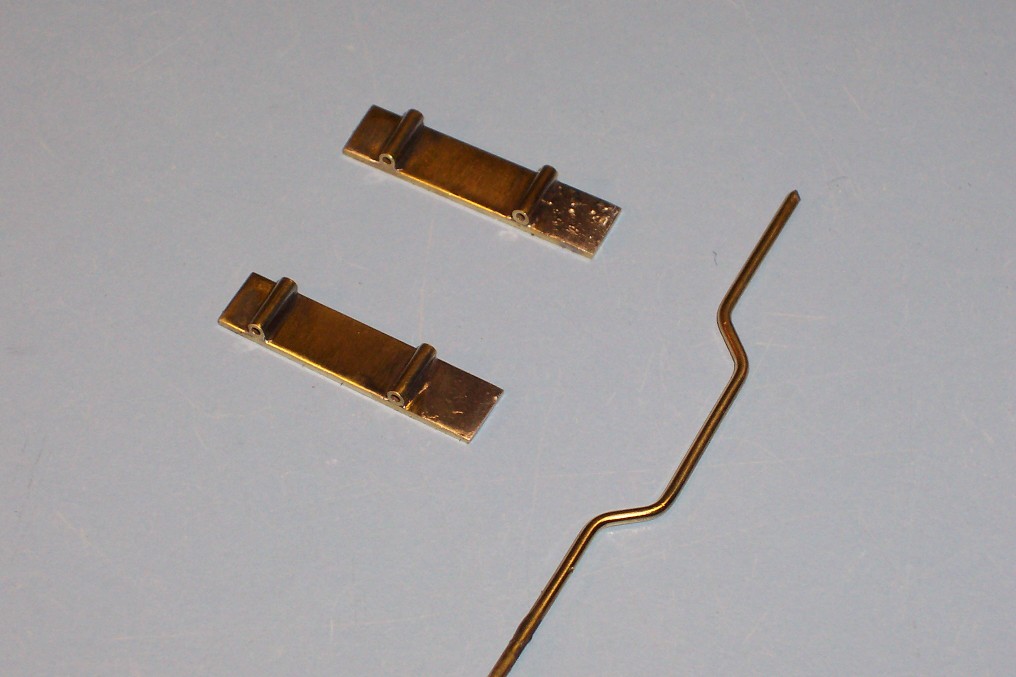
Cut, solder and bend up the pieces for the shaker plate. I'm not going to go
into how to solder or exact dimensions. Basically you want the side pieces to
be about .215 x .900, you can use .015, .025 or .032, start with K & S 1/4"
wide and go from there. There is some leeway for the 1/16" tube mounts,
just be sure to leave some room at the front for the .045 cross piece. I just
bend the cross piece by eye and keep fitting it to the car. Plan on throwing
some away.
Clip everything together in position and quickly solder the cross piece:
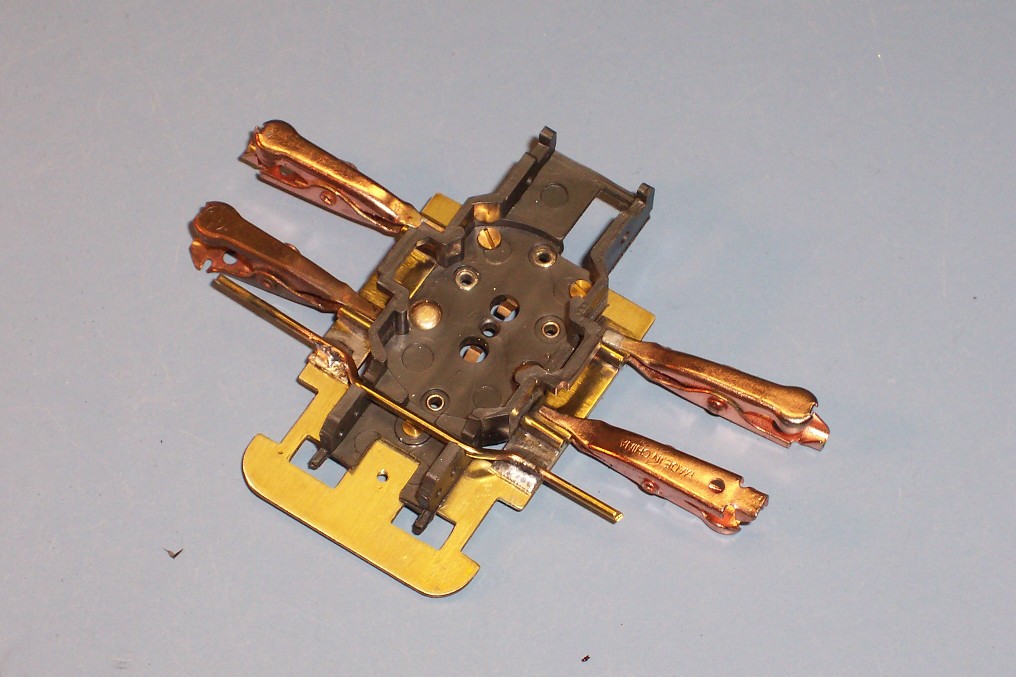
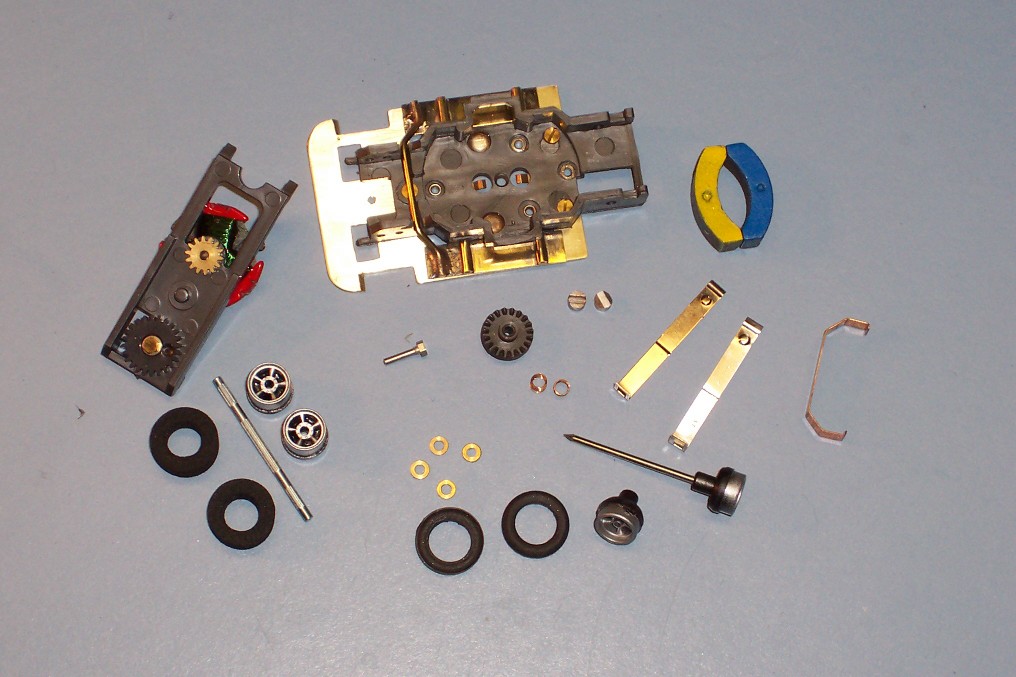
Round up your running gear, here I'm using pretty much all Aurora NOS pieces
with the exception of the JL/AW front rubber. When using the stock rims O-rings
don't give enough pan clearance and I didn't have any NOS Afx front rubber.
Notice the guide pin I'm using is a vintage TCP piece, basically a machined
bolt. You can use a 0-80 bolt and file it or an old threaded axle, it too will
have to be filed a bit so it won't stick in the slot:
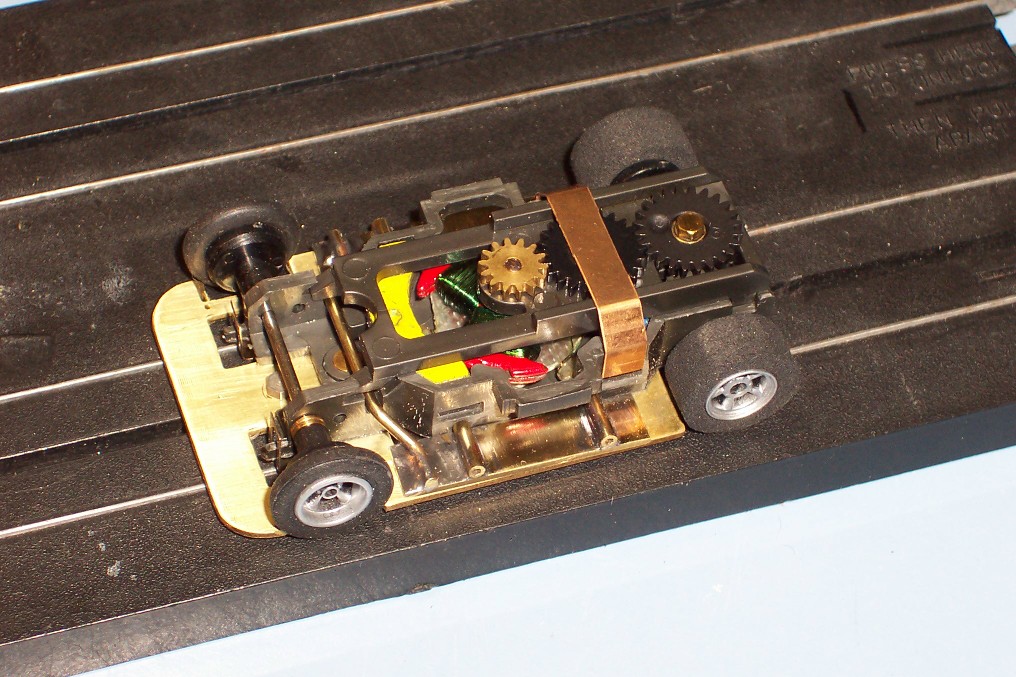
As a precaution I always tape the bottom of the pan with 2" clear tape,
you will probably also have to trim the front "wheel wells" of the
pan with a file:
Can anyone say Vintage Brass IROC? Pin on your favorite Lexan body and go, with
good rear tires, running gear and properly tweaked pickups you will be amazed
at how good they will run.
